
Assembly Instructions for MonuMount Pedestal Signs with Simulated Stone Base
Step 1
Unpack all your sign components from the skid.
Step 2
Start by leveling the ground where you are going to place your sign monument base. We recommend buying some smooth driveway pavers (12″x12″ sections) and place them on your smooth/leveled ground. This gives you a solid base to sit your base on.
Step 3
Pre dig 2 holes in the ground, (using the measurement/distance of the square holes that are in the “monument base top” as a guide (shown in photo in step #8 below). The hole depth should be below frost line in your area (we recommend a 32″ – 42″ inch deep hole).
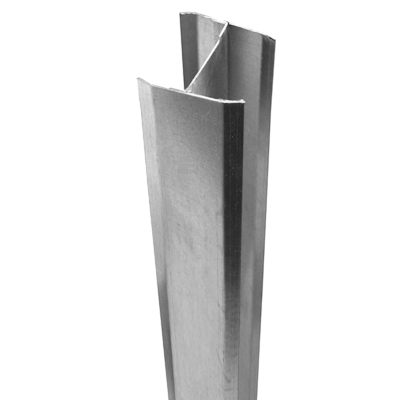
Step 4
Purchase two treated wood 4×4’s from your local lumber yard. Or aluminum “I” beams as shown below. These will be buried in the ground and extend up through the base and into the hollow PVC post sleeves mounted to the side of your sign face.
PREFERRED METHOD – For this style and size of sign, instead of using wood/treated 4×4’s you could also use an aluminum “I” beam that gets buried in the ground and then slides up through the base and into the PVC posts that hold your sign up.
We do not stock them but you can order them online yourself and have them shipped to your local LOWES or HOME DEPOT. Please note: the aluminum “I” beams will only work if you are getting the 5″x5″ PVC posts with your sign order.

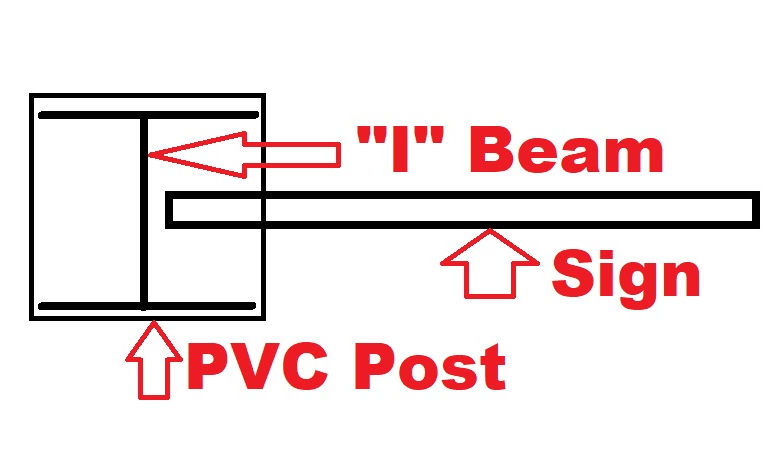
Step 6
Dig two holes (rough spacing is determined by existing holes in the monument base cap). Mount two 4×4 treated posts (or aluminum “I” beams) in the holes using concrete. IMPORTANT: Exact spacing of the posts in the ground is critical. Before backfilling your holes in the ground with dirt or concrete, slide your top sign assembly over the posts, to make sure the spacing is exact, see pic below. If using concrete, you may want to leave your sign in this position overnight while the concrete sets up.


Step 7
Assemble the monument base by sliding the endpost assemblies down onto the tabs of the front and back faces and slide in toward the middle and settle the assembly on the tab until it is even with the bottom of the monument faces.

Step 8
The monument top will slide over the treated wood 4×4 post that are already mounted in the ground (see step 9). The underside of the top includes a retainer to assist in alignment. No glue or other fasteners are required. (4×4 posts not shown in picture below)

Step 9
Have two people hold the sign as shown and slide the sign over the 4×4 posts and drop down into holes in top of monument base.


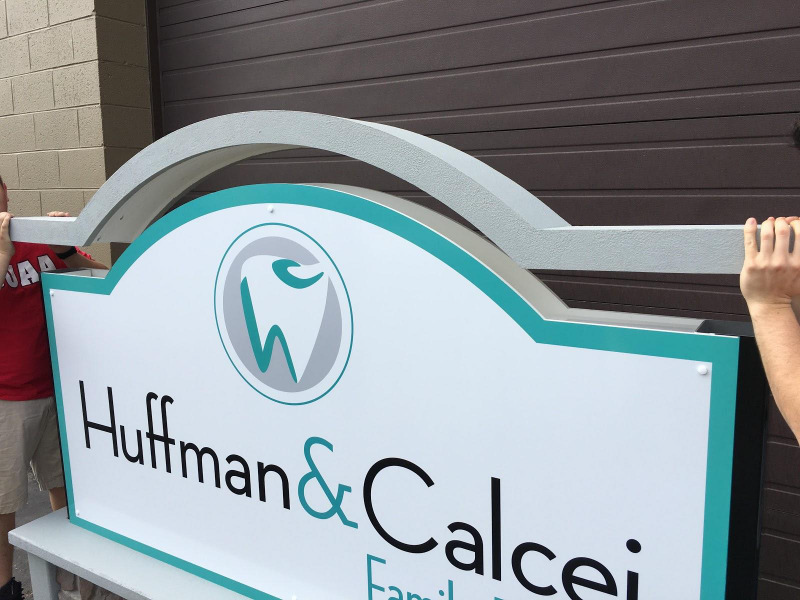
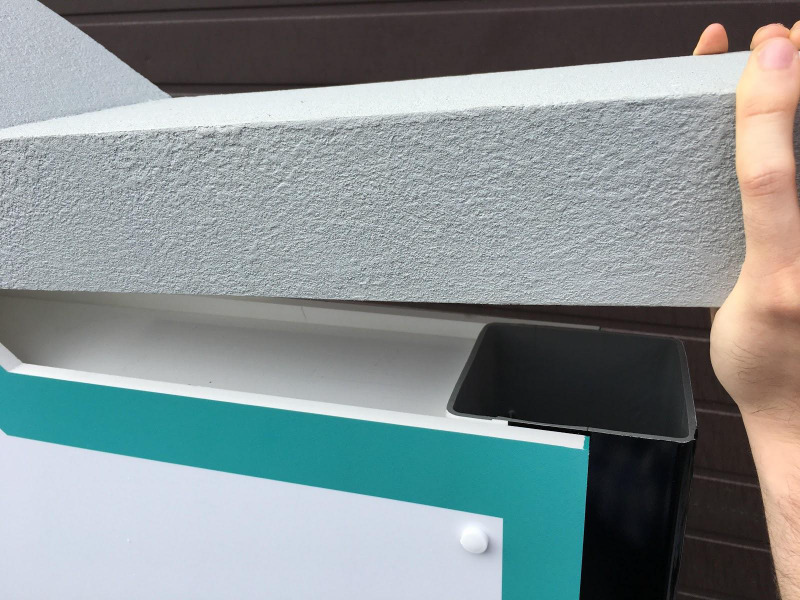
Step 10
Run a bead of construction adhesive (included) on top of sign board edges and place cap onto sign face. Be careful not to use too much adhesive and clean up any excess. Slide the sign cap back and forth and slide to align it properly.
Step 11
This is what your sign will look like when completed. For added security you may wish to use a few large stainless pan head sheet metal screws and attach the 2 vertical upright posts to the wood treated 4×4’s that are inside of it. You can place them on the outside or the inside of the post prior to the attaching the top sign “cap”.
